Tuesday, 10 November 2015

Hybrids in Mythology

Hybrids, in the mythical realm, are creatures that combine the features and body parts of more than one real species. There are also part human combinations such as the very popular centaurs and mermaids.

Alkonost - which is a bird with the head of a beautiful women

Alkonost's are notorious for their hideously beautiful voices. They torment the damned with haunting terrible songs so they never get any peace

https://upload.wikimedia.org/wikipedia/commons/2/28/Bilibin_Alkonost.JPG

Adlet - Human and Dog Cross

These mythical beasts are the monstrous offspring of an Inuit woman and a large ferocious red dog. A litter of ten bloodthirsty, fur-covered and dog-like children were created from this very unnatural union. Fully covered in fiery red fur, these beasts had some lupine features such as a long snout, pointed ears, long tails and piercing yellow eyes.

https://blogger.googleusercontent.com/img/b/R29vZ2xl/AVvXsEiS-Hr6rEYRmxIVdYE9FldBMWn9VQ27Mzg7V23rXuuizxR__R0Q_Tc2qvfPcSEy9OnUa4tcbQpISqA4XDVzHHxAp3Vr6SPCKk8rnlw_aLYSFbzA-oD_npmaVBwRy1eMORcgQDmJqFVtWhM/s1600/adlet.jpg

Centaur - Human horse hybrids, top half human with a body of a horse

Centaurs were said to be the offspring of Ixion, son of Ares and a cloud. They were either depicted as wise, strong and admired or wild, destructive and untamable, depending on which half ruled. These mythical hybrids could be wise, peaceful and strong figures in total control of their ability to be agile and powerful swift archers.

http://www.greekmythology.com/images/mythology/centaur_108.jpg


Echidna - Upper half a Beautiful women and lower half is a serpent

Echidna was an extremely beautiful woman from the waist up but her bottom half consisted of the large creepy coils of a snake. She would entice men with her tantalizing attractiveness, all the while concealing her lower half so she could lure them into the darkness to kill and devour them.


http://usercontent1.hubimg.com/9769654_f260.jpg

Goat Man - Half Goat and Half Man

Goatman is said to have been a brilliant scientist that was transformed into a hideous beast when one of his experiments went horribly wrong. This resulted in him being cursed with an abnormal, twisted body that was littered with goat-like features.

http://www.emuseumstore.com/assets/images/t1929-pan-playing-the-lute.jpg

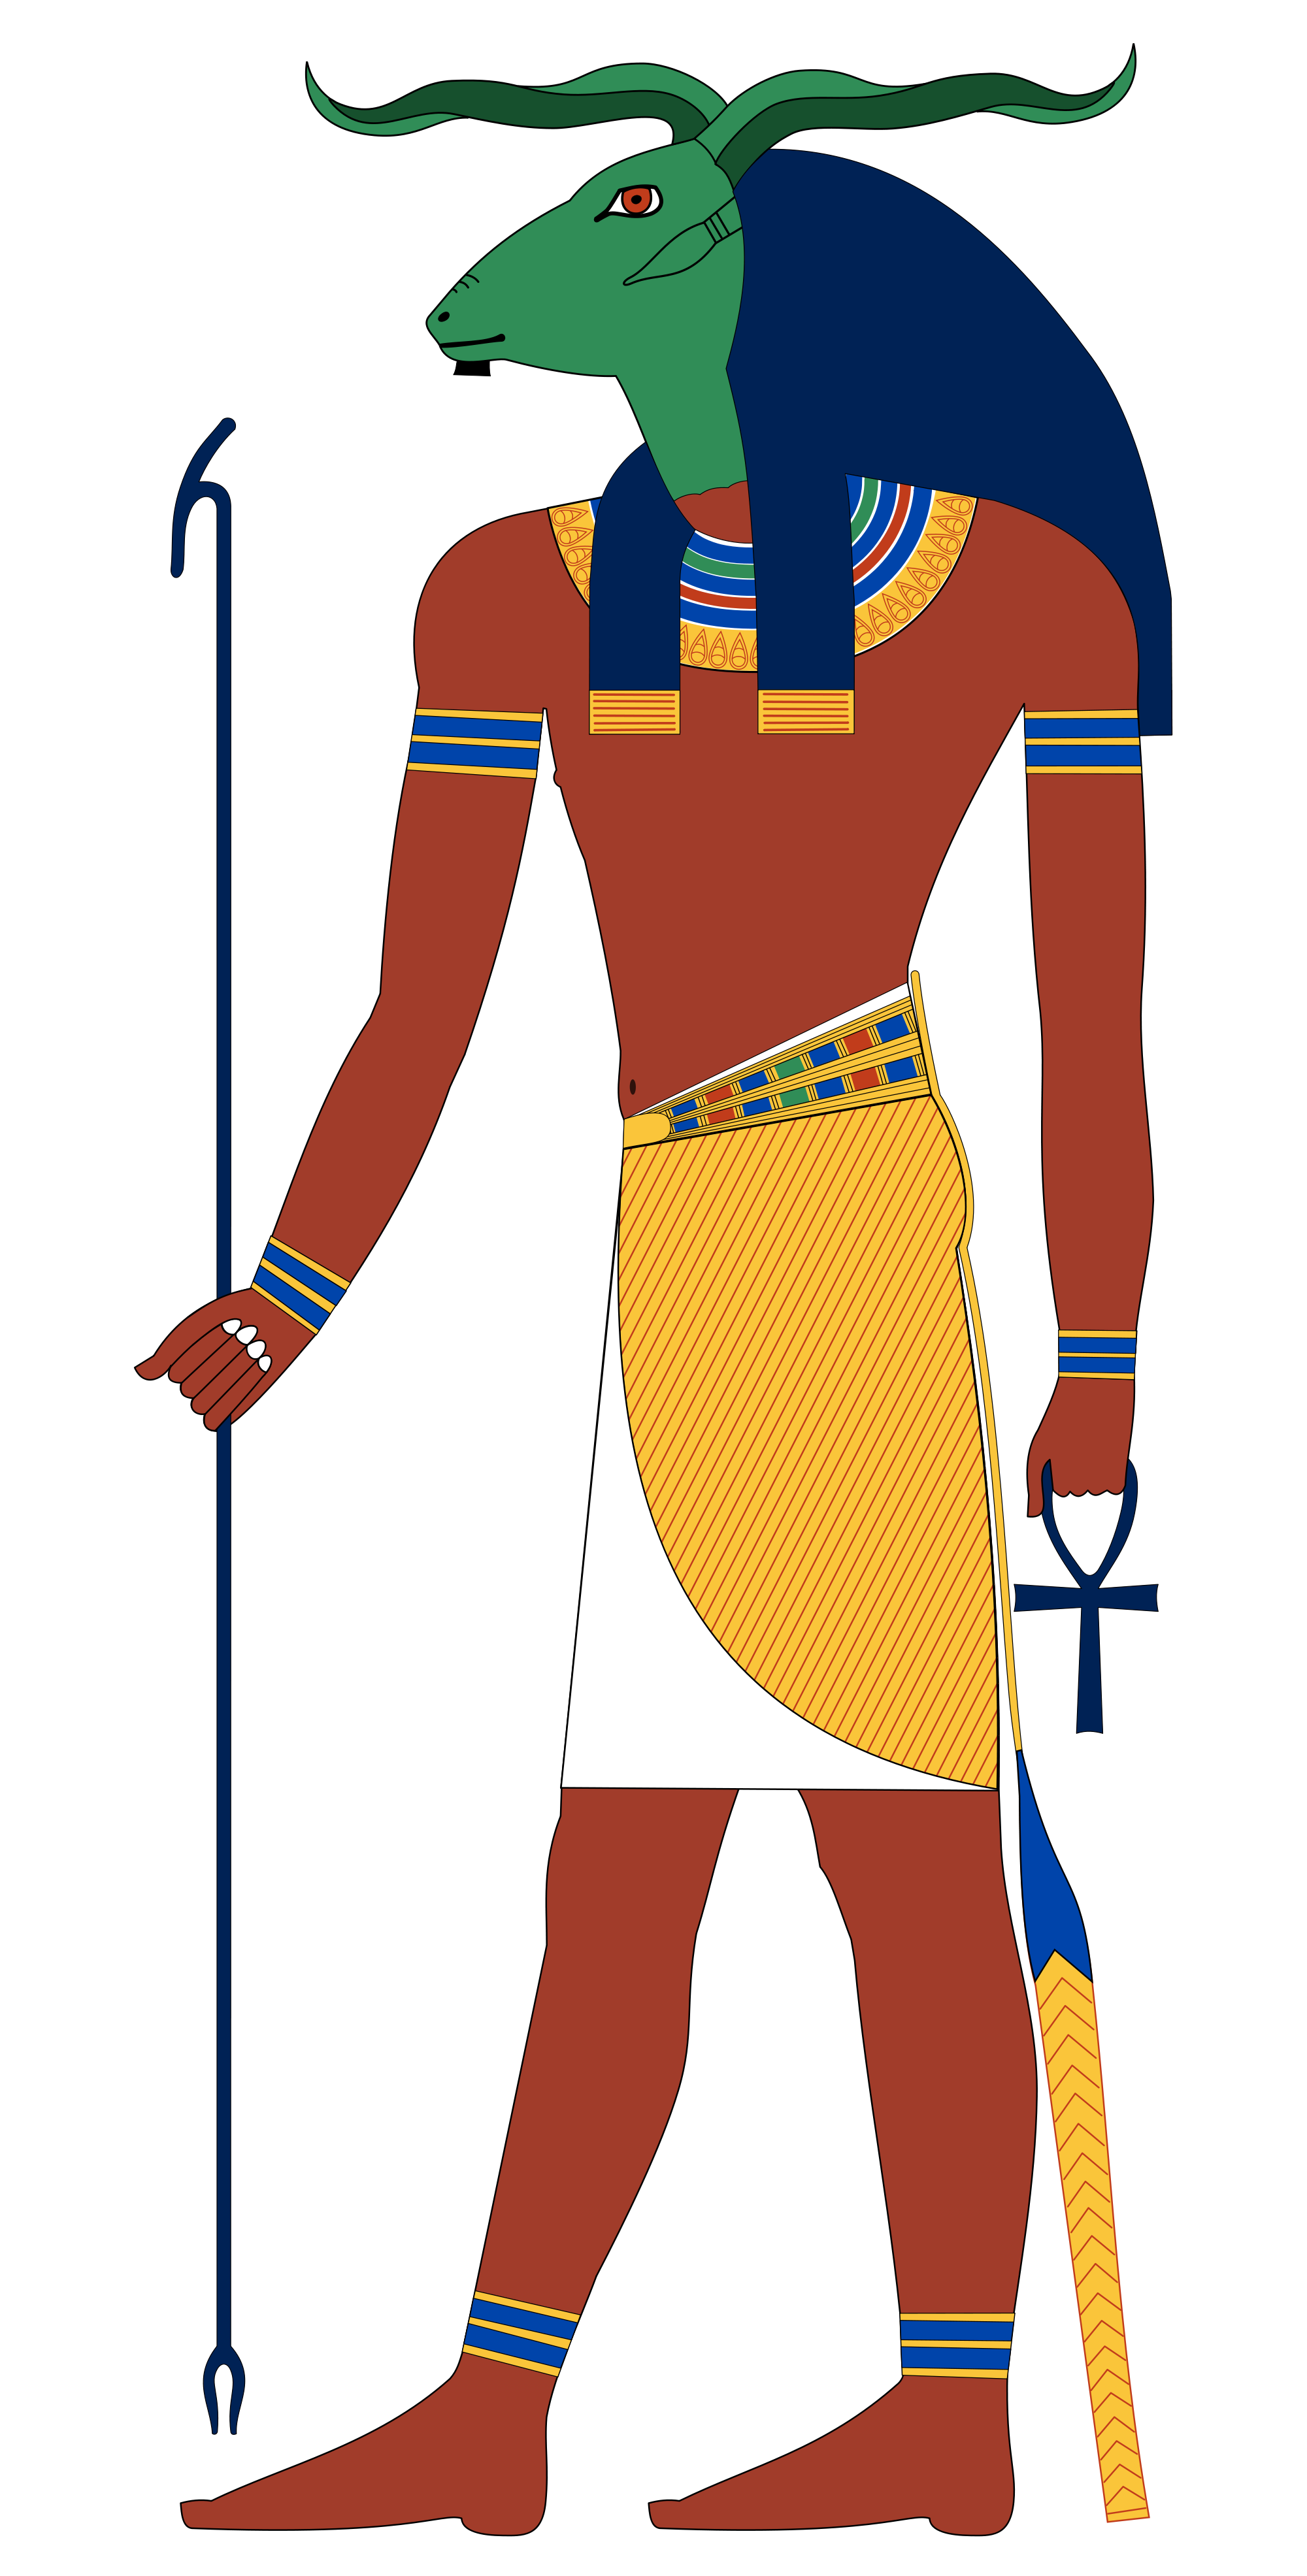
Khnum - Strong human male with the head of a Ram

Khnum was one of the most ancient gods of Egypt, whose worship is thought to have been popular as early as the Predynastic Period. Khnum, also spelled Khnemu, ancient Egyptian god of fertility, associated with water and with procreation. 
He was represented as a ram with horizontal twisting horns or as a man with a ram’s head. Khnum was believed to have created humankind from clay like a potter; this scene, with him using a potter’s wheel, was depicted in later times. 


https://upload.wikimedia.org/wikipedia/commons/thumb/5/5e/Khnum.svg/2000px-Khnum.svg.png


Resources Used:
  • http://www.ancientegyptonline.co.uk/khnum.html
  • http://www.mythical-creatures-and-beasts.com/hybrids.html
  • http://www.britannica.com/topic/Khnum

Friday, 6 November 2015

Added Touches to my Human/Frog Hybrid

So I decided to look at the eyes of the Ornate Horned Frog, as you can see
their eyes are quite similar to human's eyes. They just have a huge Black Pupil
They don't have an Iris like Human's do. 

This is an Ornate Horned Frog's Eye, I don't think I will be able to find
a contact lenses that have the brown speckle on each side of the pupil. 

http://cdn4.rebuildyourvision.com/wp-content/uploads/2013/07/The-Development-
of-the-Eye-throughout-Your-Life-300x228.jpg
A Human Eye has Iris around the pupil (this is the coloured bit around the black
part) 


I've decided I'm going to use on my Model, Black Contacts that block out the
Iris completely this will work perfectly replicate the Eyes of a Ornate
Horned Frog. This will help to give a subtle element of a Frog. 


This is my Model with the black contact's in, as you can see this already gives the
feel of an Frog. It worked really well the only thing I had to be aware is
that my model has to put the contacts in first before I apply the Prosthetic Piece's

Colours and Markings of Frogs

Amphibians have a wide range of colours and markings from bright reds, blues and yellows to muddy browns and greens, some have spots or stripes.
Some amphibians are darker on top with different colour and pattern underneath. Like other animals amphibians can be either very colourful to show predators that they are poisonous to eat or they can blend into their surroundings.
Frogs colour can be to absorb or reflect heat or attract a mate. The main colour and markings in a frogs skin are produced by three different colour pigment cells - white, yellow, brown and black. The skin of Amphibians varies with humidity and temperature it may become pale when warm and dry or darker if cold or damp.


https://c2.staticflickr.com/6/5102/5763904401_ddda106cd7_b.jpg


http://www.amnh.org/var/ezflow_site/storage/images/media/amnh/images/frog/311113-1-e
ng-US/frog_dynamic_lead_slide.jpg


https://s3.amazonaws.com/EarthwatchMedia/GalleryImages/7-mahony-australias-van
ishing-frogs-c-ross-knowles-h-6_1178_onwebsite_5058.jpg


Resources Used:
  • Clarke, B. (1998) Amphibian (eyewitness guides). United Kingdom: Dorling Kindersley Publishers. Citations, Quotes & Annotations (Clarke, 1998, pp. 14 – 15)

Thursday, 5 November 2015

My Brave New World Environment for my Human Hybrid


I want to stay true to the actual habitat of the Ornate Horned Frog, I've chosen one country when you will be able to find this type of Frog which is Brazil. I want my Human Hybrid to live in a Brazilian Forest with the rest of the animals that can be found here. 


http://i.livescience.com/images/i/000/042/318/i02/atlantic-forest-interior-
sunlight-110424-02.jpg?1320192561


http://static01.nyt.com/images/2012/05/17/world/brazil1/brazil1-superJumbo.jpg

https://exploringthearth.files.wordpress.com/2012/12/amazon-tree-canopy-brazil.jpg

Wednesday, 4 November 2015

Bald Cap Application

Even though I didn't use a Bald Cap I thought it would be handy to make an application process for it.

Step by Step: Prep
  1. Start by removing any make up from your model's face - this will help when it comes to the edges of the bald cap.
  2. Next you will need to spray the model's hair with wet and make sure to brush it through in to remove any tangles and that the hair is smooth.
  3. Using a hair gel generously spread this through the hair - this will help with manipulating the hair.
  4. Depending on the hair length - if the model's hair is short wrap the hair to the side and make sure it is as flat as possible. If the model's hair is long split the hair into two sections and wrap in opposite sides of the head and again make sure it is as flat as possible.

Step by Step: Application
  1. When applying the Bald cap get you model to hold the front of the cap while you pull the back of the cap over the hair.
  2. Using a pin tail comb push any hair poking out from the edges
  3. Once the cap is placed on the model's head and you are happy pull the edges and start to cut away the excess - start at the ear.
  4. Once you are happy with the edges apply spirit gum to both the cap and the model's skin.
  5. Wait for the spirit to gum to go tacky
  6. Using a damp flannel press the bald cap down and use acetone to blend the edges.

Step by Step: Make Up
  1. Using your supra colour palette mix pink and white and stipple this on to the bald cap - this colour mixture will help to cancel out the hair colour.
  2. Once you've cover the cap with white and pink mixture use the foundation palette and using the appropriate shade stipple this on top.
  3. Apply a translucent powder to lock in the colour.
  4. For additional detail use flicking motions using the alcohol activated colour palette to create freckles or veins on the head.

Tuesday, 3 November 2015

Making the Prosthetic Piece's (First Attempt)

I started off my Silicone Mold, I made sure it was clean with
Alcohol then I spreadtwo layers of Super Baldiez
mixed with Alcohol - I made sure each layer was dry before adding
the second Layer.

Once my Silicone Mold was Prepped. I made my
Mixture of Silicone A and B and added a small
amount of Green Pigment and White to
the Mixture - this was to create the colour of the
Prosthetic Piece, I used 8g of A and B and 12g of
Deadener to make the Piece soft and flexible.

This is the Mixture before Pouring into my Silicone Mold.
I was very happy with the colour as it was very close to
the colour on my Face Chart.

This is the Mixture inside my Silicone Mold. I left it to set
for a couple of days, in order for it to dry completely.


I was very Happy with how the Prosthetic Piece came out, it was very soft and
flexible this was because I added quite a bit of Deadener. The area that blends
into the skin came out pretty well to, there were hardly any rips. The only thing
that didn't come out like planned was the bumpy bit right at the top, I'm not
completely sure why this happened but I don't think it will effect my look too much.
I'm worried that my second Prosthetic piece isn't going to look the same, as the colour
is difficult mixture to get.


My Second Prosthetic Piece (FAIL)


So this is my second Prosthetic Piece, all my worries came true
this is not what I was expecting to come out of my Silicone Mold.
When I was trying to remove it from the mold it ripped a lot as
you can see, at the time I thought it won't be too bad. Also if you
notice the colour of this piece is much darker than my first piece
(Which I love)


As you can see there are a lot of rips in the area where it blends
into the skin. This is a major problem as this is going to make
it difficult to blend into my models skin. 

This Piece is very dark in comparison to my other piece this may be have
been due to me adding to much of the green pigment, also another failure is
that this piece is extremely hard and isn't soft or flexible like the other
piece. When I was making the mixture for this piece I couldn't remember
how much I used of Silicone A and B and also the deadener, so this is why
it wasn't soft like the other one. 


Monday, 2 November 2015

Making the Silicone Mould for my Prosthetic Piece


I was really happy with how the Silicone Mold came out, the clay left me a perfect shape. I had to use quite a lot of Silicone mixture as my Clay piece was very high. I ended up using 70g of A and B to get enough silicone to reach the top of my Clay piece. I was worried at first that it wouldn't reach the top of the clay piece. This whole process was very easy I know off memory what to do as I've made this silicone part a couple of times. I think it really helped creating the wound first of all.